In this tutorial, we will see how to schedule inspections. The Scheduled Inspections tab can contains one or many different Inspection Forms (click here to read the article explaining how to create Inspection Forms). Those Inspection Forms can be printed out to employees or they can be completed on screen. When you fill out an Inspection Forms on screen, a Completed inspection is created and Issues are created from the "Failed" items. Those Issues can then be converted to Work Orders or Completed Services.
To create and manage the Scheduled Inspections, you can either do it from the global list of Scheduled Inspections here: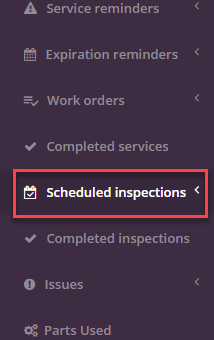
Or you can do it for a specific vehicle by going to the details of a vehicle: 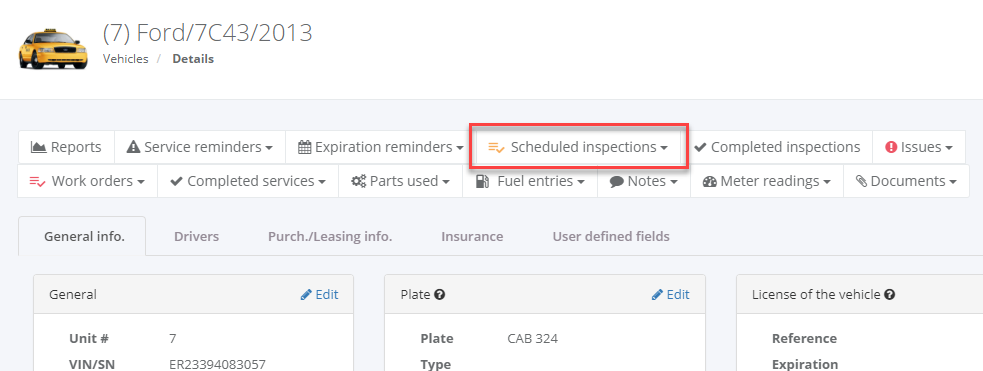
Let's do it with the global Scheduled Inspections view: 
There is actually only one Scheduled Inspection. Let's create a new one: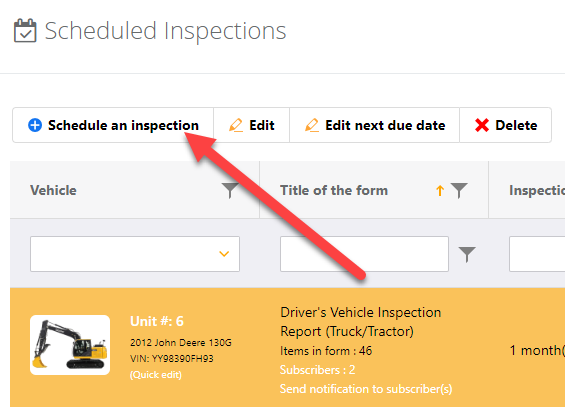
You will first be asked to select a Vehicle and an Inspection Form:

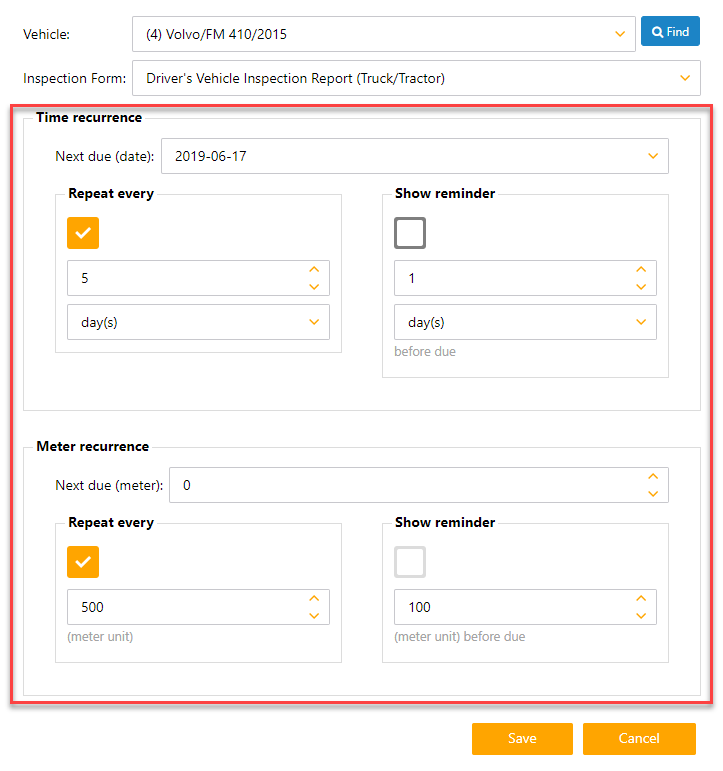
You will then be allowed to edit Time and Meter recurrence of this Inspection. By default, these parameters were automatically populated when you selected the Inspection Form at the previous step:
You now have a new inspection form in your Scheduled Inspections:
More details about the "Scheduled inspections" grid:
- Vehicle : The vehicle to which the Scheduled Inspection is assigned.
- Title of the form: The title of the Inspection Form. When printing out the form, it will be displayed at the top.
- Inspection interval : The interval at which this inspection should be performed.
- Last performed: The date and meter this inspection was last performed for this vehicle. As it has just been added to the inspection program, it is set to "Never peformed".
- Next due date and meter: When this inspection will be due next. By default, it is set to the current date and current meter of the vehicle. If the value in this column appear in yellow, it means this inspection is due soon. If it appears in red, it means it is overdue.
Edit the frequency settings
To edit the frequency settings, just double click the scheduled inspection (or click on the "Edit" button), make your modifications then click "Save".
Subscribers
Subscribers are the users that will receive email reminders with info about reminders that are due soon or overdue. Click this link to add or remove subscribers to the scheduled inspection: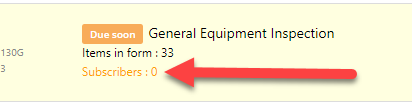
The list of users will popup letting you select subscribers for the selected scheduled inspection: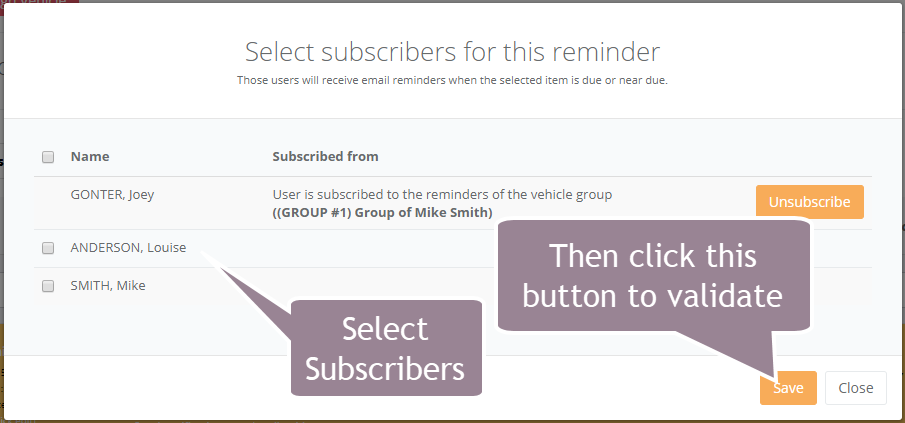
For more details about this feature, please refer to this article about subscribers for the Service Reminders. It works the same way as reminders for Scheduled Inspections.
At this stage, you know how to create Scheduled Inspections for your vehicles. Now let's go a little further with this...
Print and/or fill out the form
Now you can print the Inspection Form and give it to the Driver/Inspector to complete. Use these buttons to print or preview the form: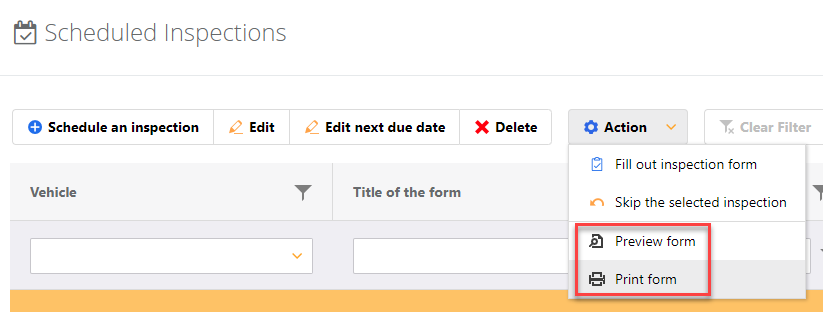
The printed form will look similar to this: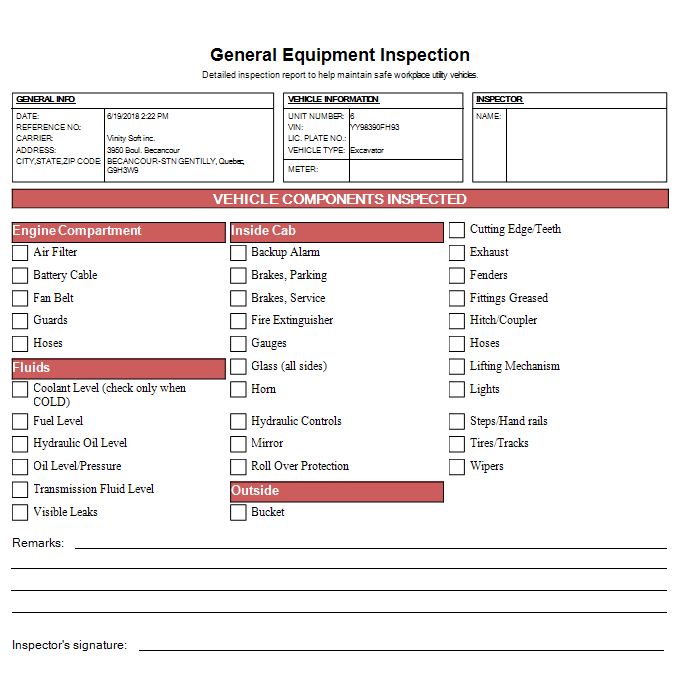
When the inspector comes back with the form completed, you can enter it in the software by using this button (of course, the inspector could use a tablet or even a smartphone to fill out the form directly within the software, so there would be no need to use paper form): 
When you click this button, a new Completed Inspection is initiated, letting you enter the details of this Completed Inspection: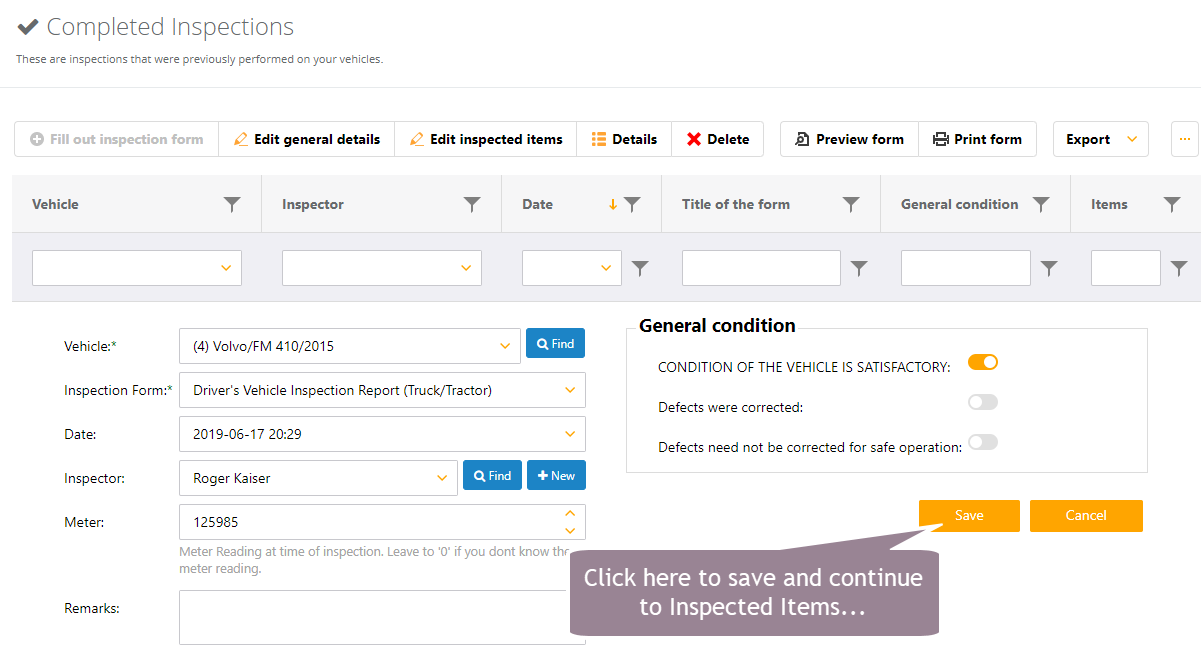
At the next step you will be allowed to check items that passes the inspection. For other items, you are allowed to enter some comments and upload photos to explain why they did failed inspection: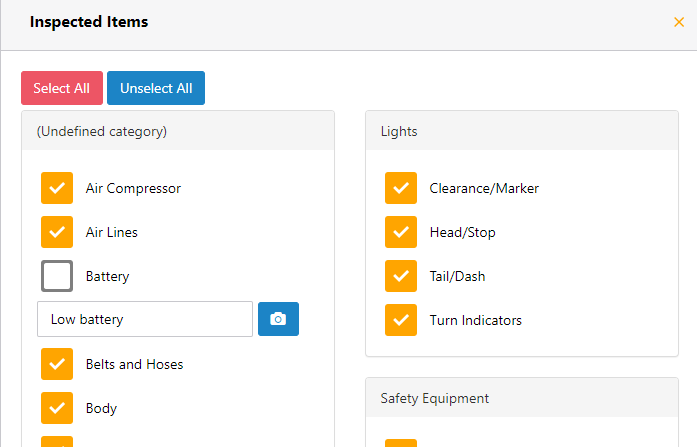
When you are done, click the "Close" button at the bottom of this form: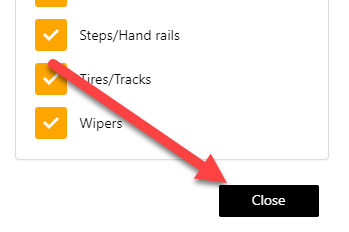
If there is "Failed" items, you will be asked if you would like to create "Issues" from these "Failed" items: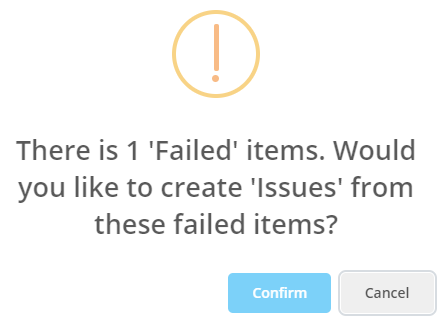
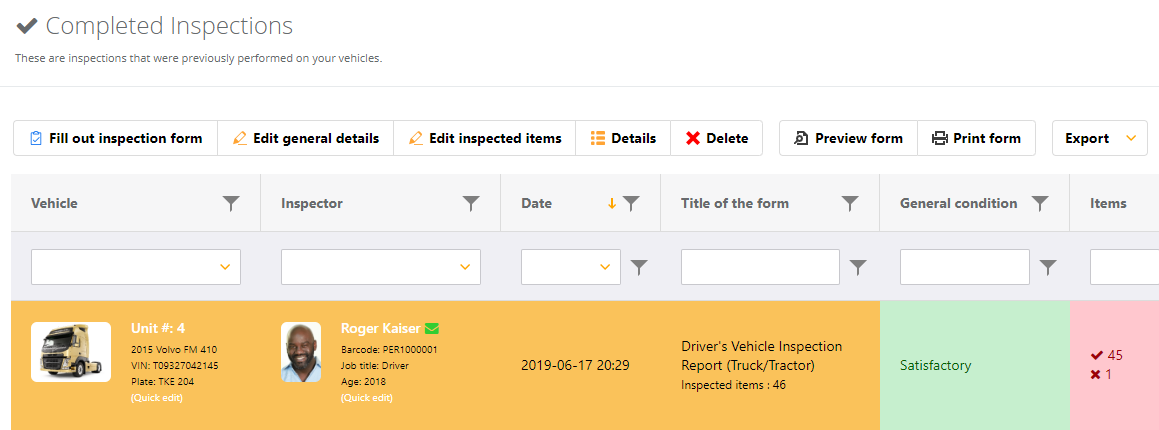
That's it. You have just created a Completed Inspection record as well as an Issue record:
See the Completed Inspections...
Whenever you want you can edit the details or Inspected Items of a Completed Inspection using these two buttons: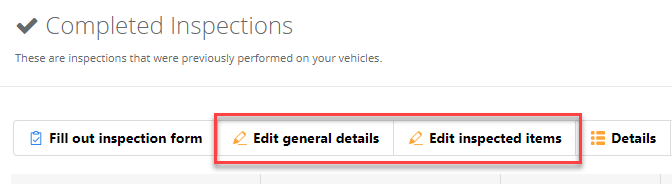
See the Issues section for the newly created issue...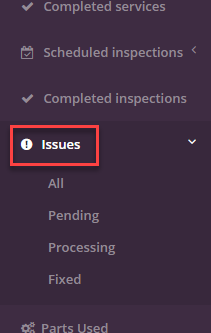
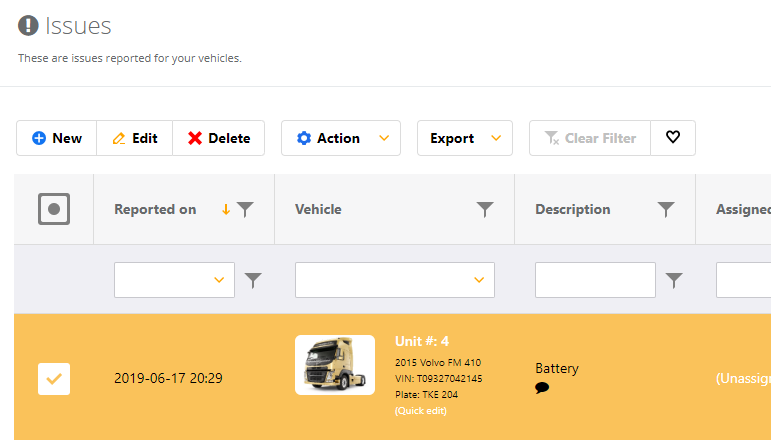
You can now choose to convert those newly created Issues to either Completed Services or a Work Order using those buttons: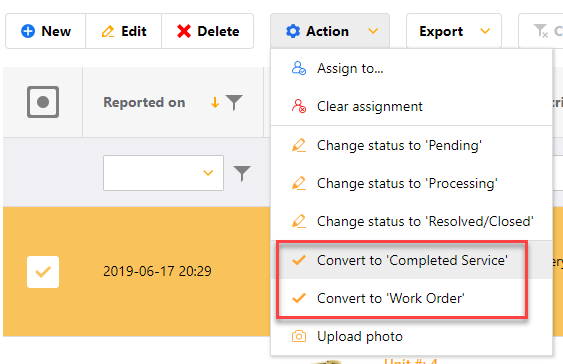
If you want, you can access the Completed Inspection and Issues for specific vehicles from the detail view of a vehicle: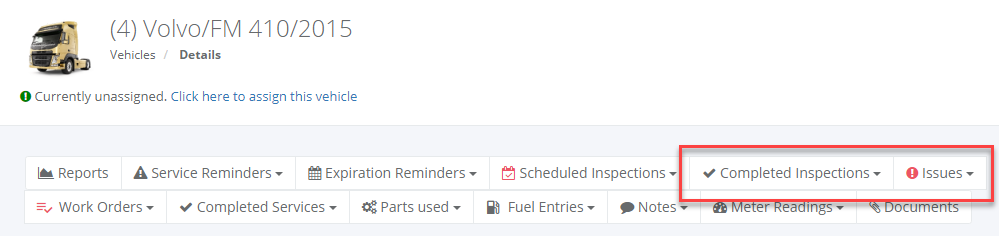
Congratulations!
You're done! You now know how to create and manage Scheduled Inspections.
Comments
0 comments
Article is closed for comments.